Today I realized I am always talking about junk journals, but really haven’t taken the time to properly introduce what one is and what it can be used for or even how to make one step-by-step yet. This post will hopefully fix that problem. 🙂
In order to give junk journaling it’s proper due, this post today will dive in deep on everything you ever wanted to know about junk journaling for beginners.
Here’s what we’ll explore in this post:
- What it Means to Junk Journal
- Ways to Use a Junk Journal
- Basics for How to Make Junk Journals
- Overview of Bookbinding Methods
- Summary of Different Junk Journaling Techniques
First Things First: What is a Junk Journal?
Like art journaling, there is no “one size fits all” definition for what a junk journal really is.
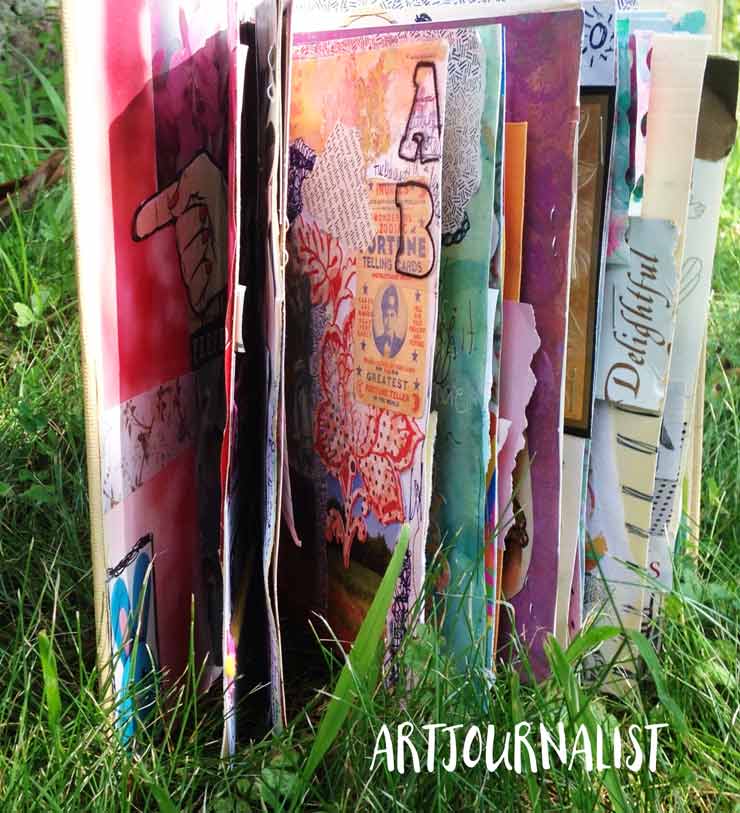
Junk journals can vary from person to person, but it generally most of them do share one primary characteristic: The journal is made with mostly a mix of found and recycled materials.
Now, what the journal is used for and the purpose of the junk journal itself of course will vary greatly from person to person!
Many people will even call it a junk journal because it is a mash-up of all the “junk of life”, which we talked a little bit about in my post on the Junk-to-Joy Gratitude journals.
For some people, myself included, a junk journal is sort of like that junk drawer in your kitchen – it has a little bit of everything and anything!
The Official Junk Journal Definition
Of course, finding an “official definition” is not completely possible, since it is not in the dictionary of course, but I’ve tried my best to get a definition that sums it up as clearly in one sentence as possible.
Junk Journal: A book which is often made through found and recycled materials to be used as a way to collect and record memories, thoughts, ideas, and inspiration.
This is a little bit of a generic way to sum it all up of course, but I think it does explain it clearly for those who may have no idea what a junk journal might be.
This is the general definition I use when I try to explain a million times the differences between scrapbooking, art journaling, junk journals and planners to the non-crafty people in my life.
5 Ideas for Ways to Use a Junk Journal
Since a junk journal is a mash-up of all sorts of things, naturally everyone uses their journal differently and enjoys their own unique process in creating it. If you are curious for some ideas on ways to use a junk journal, there are lots of great ways to make it work for you.
1. Use it as an Everyday Journal
An everyday journal is just what it sounds like – it’s a journal you use for the everyday stuff of life. It’s one of those journals where pretty much everything and anything might end up in it.
You can also collect and display ephemera from the daily things you do – maybe a sleeve from that cup of coffee you enjoyed with a friend or a tag from something you bought.
These types of junk journals are a great way to remember different things from life. It’s a fun way to document and remember all those little moments that make life big.
In a way, it sort of becomes a daily scrapbook for many people, but of course you can always include things like written journaling, notes or to-do lists.
2. The Junk Journal Planner
Another great way to use a junk journal? As a planner!
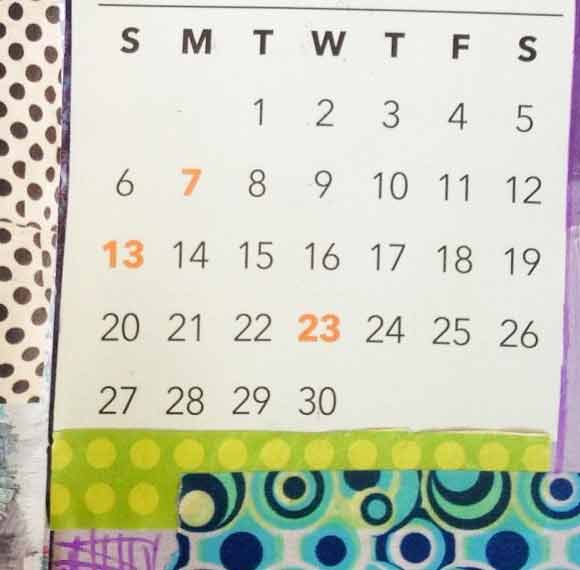
I am one of those people who is always has my brain in “to-do list mode”. I also tend to LOVE all the little planner-craze stickers and washi tape and papers – so it is really a win-win to use a junk journal in this way because it feeds my stationary-paper-sticker-obsessed part of self.
You can choose whether to keep the journal in calendar format, or just make it a fun way to explore ideas and keep track of projects you are working on.
3. Make a Memory Book
A memory book is a book that showcases the life and memories of a person. This is a great way to use and display personal paper ephemera like birthday cards, anniversary cards, ticket stubs, etc.
Yesterday we were going through some old things in our garage when we stumbled across an entire box of these things from my husband’s late grandmother he had been saving for almost a decade now. It had a lot of cute old vintage cards, paper scraps from when they traveled, receipts from things they bought, stuff like that.
We didn’t even know this box existed, but since stumbling upon it I am definitely planning on making a pretty book to display these things.
Having all those little scraps of her life in the garage collecting dust certainly does not do any of these things from her life justice. By making a junk journal memory book, we can have a nice book that can be shared with the whole family as a special way to remember his grandma.
And once I get the first one done, I will definitely be doing this with my parents.
4. Personalized Gift Idea
Junk journals make for a super personalized and creative gift to give to someone, especially for those sentimental types of moments like holidays, graduations, weddings, anniversaries – but even just for fun.
Of course, this relies on the recipient understanding and appreciating the journal – but it definitely can be a great idea.
For example, a few Christmases ago I made a holiday junk journal for my mother-in-law who is also an artist and somewhat of a paper collector like me.
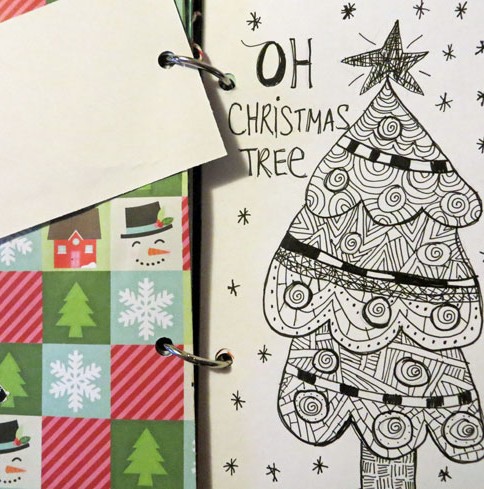
It makes me so happy every Christmas to see she’s added more and more to it each year.
5. As a Theme Book
Another great way to do these junk journals is to give them a specific theme. If you look at our art journal theme ideas list there are tons of ways you can make a book have different subjects or surround a central theme.
For example, you could make one that is all things flowers and gardening, or make one that has a theme from a certain story or book like Alice in Wonderland. These themed journals can be a ton of fun to go through and see all the different little things.
Of course, these are just a couple of ideas. You can do anything in a junk journal, just like you would with an art journal. In fact, you can even use a junk journal as an art journal!
Junk Journals as Art Journals
I love creating mixed media junk journals as an art journal. It’s all the more fun for me to combine tons of different paper scraps and ephemera with my favorite mixed media supplies like acrylic paints, gesso, watercolors and more.
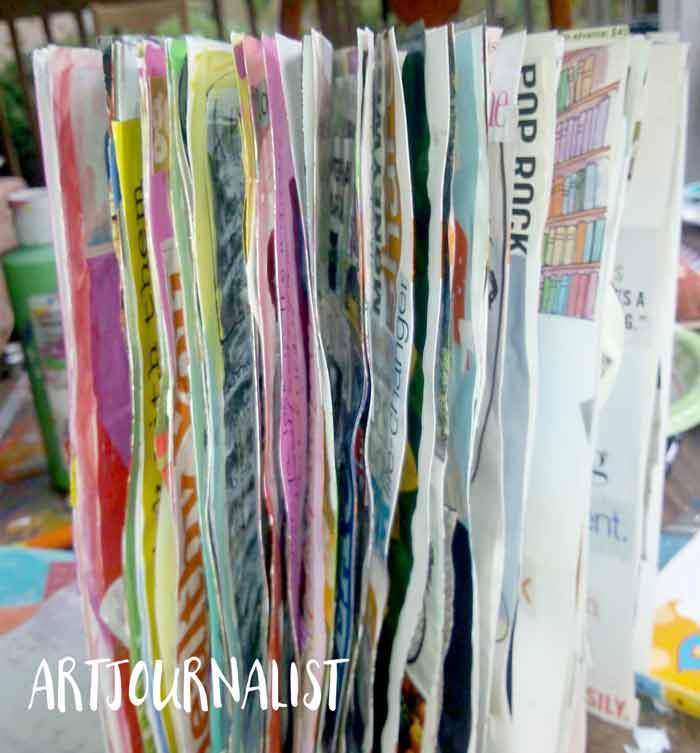
Many of my junk journals are also part art journal. I love using those “messed up art pages” as a base for new pages in a new journal.
How to Make a Junk Journal
Hopefully I will have a chance to update this with a full video tutorial for how to make a junk journal in these next few weeks. For now I will go through the basic steps of everything you need to do to get started!
Step 1. Choose a Subject/Purpose
You don’t have to have a specific theme, but it does help to sort of decide what purpose the journal will serve when you first start. This gives you a little bit of a place to focus. I think one of the big reasons a lot of people don’t jump right into junk journaling is because it is sort of overwhelming with everything all at once!
Having a focus can help narrow down the overwhelming choices. For example, if you pick a theme like “flowers” you can easily put together everything that is flower and garden related.
You don’t have to start with a super specific focus at first. Don’t worry, the purpose can be general: “To mash-up whatever paper ephemera I happen to find in this box” – or it can be very specific “To do something with all those papers of my grandparents in the attic”.
See our post of journal theme ideas for more inspiration!
Step 2. Choose a Book Binding Method
There are TONS of great book binding methods for making a junk journal. There are basically four methods that are most popular.
Sewn Book Binding: With sewn binding, you will actually be stitching the papers into the cover of the journal. There are many, many different sewn binding techniques and ways to stitch in the papers.
You can see how we make a junk journal using a simple pamphlet stitch in our Upcycled Blue Jean Journal Tutorial.
Binder Rings Method: This is a very beginner-friendly way of binding a book together. For this method, all you need are a few binder rings and a good hole punch. Punch holes in the paper, insert the binder rings and you are ready to go.
Where do you get binder rings? I’ve found the best place to get binder rings is online at Amazon, such as this set of 70 count assorted rings. They are also sold at office supply stores and craft stores but you can’t usually find as good of a value. An added bonus? 70 binder rings will keep you very, very busy creating for a long time! That’s enough to make anywhere from 20-35 books. 🙂
My No-Sew Elusive Perfect Journal Method: I don’t really know if this method has an official name, but it is similar to Midori traveler’s notebooks. You can see an example of it shown above. It is super simple, you can reposition all of the pages, and no sewing or hole punching is necessary. This is why I call it the “elusive perfect journal” – and you can view the full junk journal binding tutorial with video here.
Altered Book Method: The last method is to simply use a notebook or book that already exists and alter it to work as your junk journal. This takes a little prep work, but definitely is a viable option, especially if you don’t really want to get into binding your own journal.
You can use any kind of journal, book or notebook as a base – and then just fill it up with whatever types of things you want! I have a small obsession with composition notebooks, but of course you can use anything. If you are using an old book and might paint in it, you may also want to check out our tips for how to alter a book.
The good news? You can try all of these methods with multiple journals. Just pick one which sounds like the most fun or one you can do easily right away and start!
Step 3: Collect the Supplies, Tools & Materials
The best part about junk journaling is you really don’t have to buy a single art supply to make one. Of course, you can always invest in some great tools like a paper cutter or basic bookbinding kit, but there are plenty of ways to make do with what you already have.
In fact, I would even argue stretching your creativity with what you already have is all part of the fun!
Here are Some Basic Ideas for What to Gather
- Paper Ephemera of Any Type: See our Junk Journal Supplies List and go on a scavenger hunt around your house!
- Old Books {See how I shop for used old book here}
- Book Binding Supplies
- Glue and Tape
- Scissors / Paper Trimmer
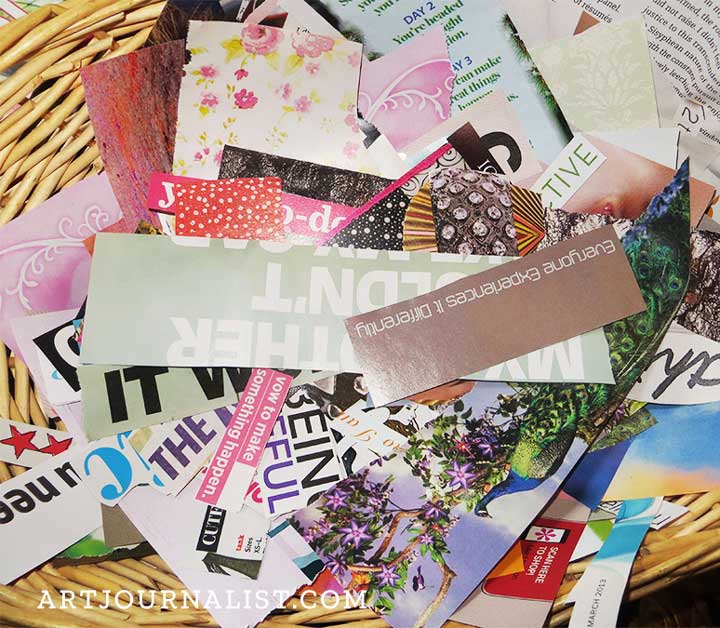
Make a big pile. 🙂 And of course, if you need ideas for ways to organize all that paper ephemera, we’ve got you covered on that one, too.
See how I organize my collage supplies for some practical tips and the voice of experience sharing wisdom on why you should not make 10,000 piles of paper all over your bed, ha.
Step 4: Assemble/Prepare the Base of the Book
This step will largely depend on the method of book binding you choose. If you will be making your own journal, this step will mean preparing a cover and cutting down the base papers.
If you are using binder rings, you’ll likely want to punch some holes into the papers at this step, or if you are sewing the pages together this is where you would do that.
If you’re already starting with a journal or existing book as the base, in this step you will probably want to do some basic prep work, like removing pages if necessary or adding bookbinding tape to reinforce the binding.
Step 5: Fill That Journal Up!
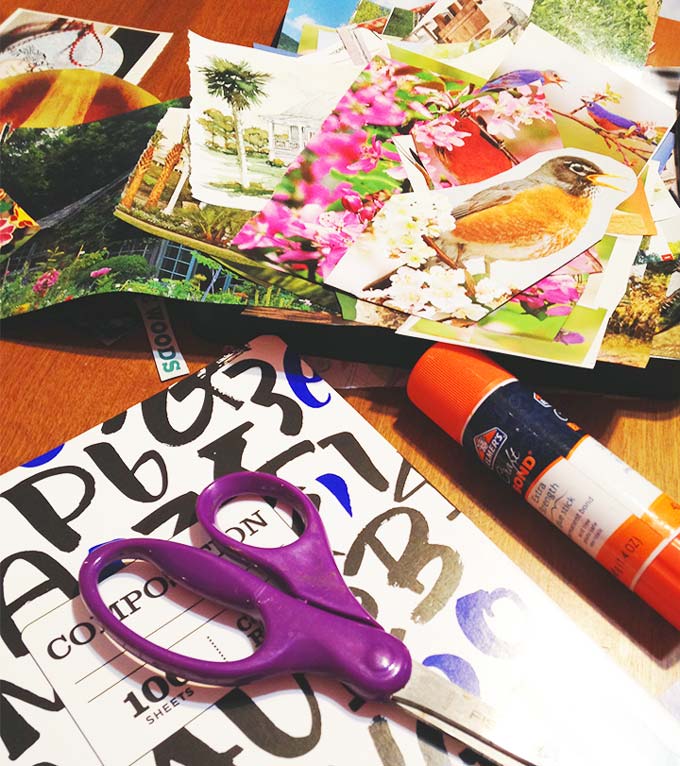
Every part of this process is fun for me, but this is where the real magic starts to happen! This is the step where you begin to fill up all of the pages with the different ephemera and items you’ve collected.
Some people like to keep their pages very organized, almost like a grid style of layout – while others simply just follow their mood and intuition and do whatever feels right.
It’s completely up to you the types of layouts and designs you create within the pages, but one thing is for certain: Pile on those layers!
Layering is what gives each page a lot of interest and depth. In general when layering I like to start with large items first, and then begin to add in the medium and smaller in pieces.
You can also accentuate almost any page with different things like stickers, stamps, ribbons, lace, old costume jewelry charms, etc. If it’s flat, it can fit into a journal!
Junk Journal Techniques to Explore
While the concept of “glue in some pictures to a piece of paper” is pretty basic and simple, there are also a TON of different techniques you can explore in making these books. Basically it’s a junk journal – so there are no rules and have fun with it!
These are those little tips & tricks that are going to give it a little bit of that wow factor and have people oooh-ing and aaah-ing and saying things like “that’s so clever” when they look through the book. Of course, I don’t typically make journals with the purpose to impress anyone with my mad paper-hoarding skills, but it is always a nice added bonus when you do get lots of compliments. 🙂
Here I will go over some different techniques that help add that wow-factor.
1. Add Pockets to Your Pages
I love pockets, because it is a great way to give the book some special hidden elements. You can make pockets in all sorts of ways, such as with envelopes, tags, etc.
If I’m making the junk journal as a gift for someone, I love to add in these pockets and put in little trinkets inside. This could be things like hot chocolate packets, gourmet tea, etc. – or heck, even an actual gift card – just make sure you recipient knows it’s there to use and enjoy!
2. Say Goodbye to Perfection: Use Varying Paper Sizes and Shapes
Not every piece of paper needs to be the exact same size and shape. Layer with different smaller pieces of paper, or even use papers that have crazy shapes. This again just builds on the depth and interest in the book.
For my Type-A personality friends, the different sizes and shapes of paper can be maddening to them. It’s okay if you have the majority of pages the same size – but don’t get caught up on trying to trim every single paper into these perfectly identical rectangles.
Embrace the imperfection and know that is part of the process and is what gives each and every journal it’s own special touch.
3. Bring Out the Stamps

Stamps can be used in tons of fun ways in the journal. You can use image stamps on blank papers or you can just use the ink pads themselves to add some color to the edges of the pages. If you already have stamps, great, use those – DO NOT BUY ANY MORE STAMPS.
{Side thought: Has anyone started a Craft Supply Hoarding Anonymous Group yet? Where can I find a local chapter meeting near me?}
Hopefully you already have stamps, but if you don’t, the best way to buy them is used. Most of my stamps were bought used, so while they are a little beat up they work for me!
While you can get away with used stamps, fresh ink is typically usually a must. For ink, I love distress inks like this set of minis from Tim Holtz.
And of course, if you watch for sales, there’s tons of great rubber stamp sets on Amazon. Don’t discount the kid’s stamps sets either. That’s a great way to get a lot of nice images without breaking the bank.
It’s also sometimes helpful to check out the daily deals section for arts and crafts supplies on Amazon – I’ve found some pretty neat things that way.
4. Make it Personal
While there are plenty of gorgeous junk journals out there, many to me seem to be over-the-top-generic. What really makes a junk journal special is when it shows a little bit of personality behind the creator {or the recipient, if you are making one as a gift.}
For this reason, it’s always a good idea to add in some things that give it a little personality. If you love something and it makes you happy or reminds you of something happy, you should do it.
Don’t keep something out of a journal just because it’s not “expected” or “doesn’t make sense to everybody”. If this means you smash up a picture of Snoopy with the Queen of England, because it reminds you of that one time you were watching a Peanuts marathon with a friend from England and that makes you happy to think of that memory, just do it!
5. Don’t Be Afraid to Print Things Out
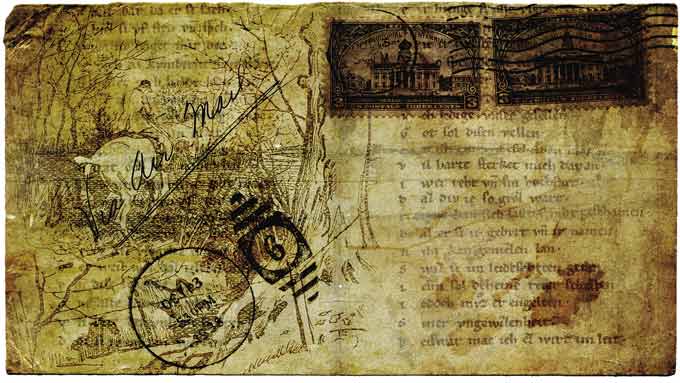
While a junk journal often uses recycled and found materials, it is 100% OK to print stuff out if it perfectly fits your theme or focus for the journal. You can type up quotes, print out photos of your own, or even find free public domain photos like the one shown above to use in your journals.
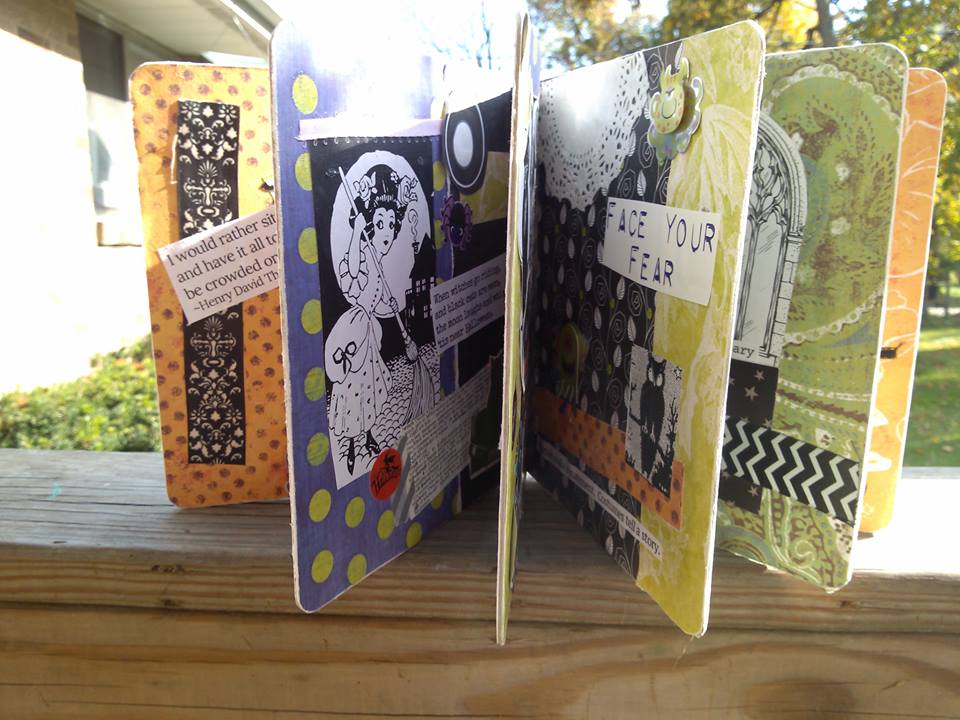
For example, for a Halloween themed altered board book junk journal shown below, I didn’t have a lot of Halloween themed items. So, the majority of the items in the book are printed out from various places online. {See my post on best places to find free printable ephemera if you need some sources!}
Also, earlier this year we got one of those Epson Eco-Tank inkjet printers, and it has been a game changer for us for printing things out. While I would still very much love a color laser jet printer, the advantage of the Eco-Tank printer is you don’t have to buy or refill ink all the time.


The printer we have is the Epson EcoTank 3700. It’s awesome. I love it. It’s still going strong. I can print 11,200 pages before I even have to think about changing the ink – and the ink is very, very economical as well.
Update 10/12/22: Since first writing how much I love this printer three years ago when this post was published – Our Epson Eco-Tank is STILL going strong! And …. I liked it so much I bought this ET-2760 for my mom, and also got the Epson Eco-Tank 8550 that does large format paper + professional print shop quality. I love these printers!!!!
Of course, you don’t have to buy a printer just for junk journaling. I just couldn’t take it anymore spending $100 or more every few months for ink. This printer eliminates that problem, because even when it is time to refill 11,200 pages later it is still cheaper than what I was paying for other standard printer ink cartridges.
Maybe there are some junk journal purists out there who don’t agree, but I figure $40 to print out 11,200 pages is a lot more eco-friendly and budget friendly than buying anything new. I see printing out images as a perfect way to use what I have – a super economical and powerful printer – as part of the creative junk journal process.
The Epson Eco-Tank also prints on card stock like a dream, no paper jams, and you can do double-sided printing if you wanted. 🙂
6. Mix Up The Way You Add in Tabs, Clips, Bookmarks and More
Another thing I think that really brings a lot of dimension and fun into junk journals is adding in little details like tabs, paper clips, book marks, and more.
I love using binder clips and paper clips to tuck different papers in. Staples can also be a nice easy way to add in depth and layers. And of course, don’t even get me started on my love for washi tape …
At any rate, it’s nice to have some variety in the different ways you can add things in. Don’t limit yourself to just using a glue stick!
7. Other Fun Ideas & Junk Journal Techniques
Of course, there are lots of other fun things to try and explore in your junk journals. A couple of other things you can look into:
- Making Pop-Up Book Style Pages
- Adding in See-Through Windows
- Coffee and Tea Paper Dyeing
- Distressing Paper With Sandpaper or Distressing Tool
The possibilities are unlimited! Don’t be afraid to experiment and try some different things that you think you might like to try. It’s only paper. 🙂
Recommended Books and Resources
When it comes to making junk journals, there are some fantastic books and online classes.
Stash & Smash: This book by Cindy Shepherd is such a fun book, and even if you are experienced and know a lot of the techniques already, it’s such a fun and beautiful book to look through.
Bound by Erica Ekrem: This a book that goes over the basics for some popular bookbinding techniques. I like the book has some nice diagrams for references, especially if there’s a specific type of binding you want to do but can’t remember the exact stitching steps. If you are a beginner, you may need to supplement with a video, especially if you are more of a kinesthetic style type of learner.
I hope this overview of Junk Journaling 101 for Beginners is helpful for you. And of course, if you ever have any questions, feel free to ask any time in the comments section below or in our Facebook community group. 🙂
Join our facebook group!

Share what you’re creating and working on, ask questions + connect with over 4000 creative artjournalists for inspiration + ideas!

What do I do if I don’t have any pictures or receipts, stubs, etc. I don’t save stuff like that and the only pictures I have are family that I don’t want to give up.
You can always print things out or make copies of things like photographs. Magazines are fun too. 🙂
Hi you can ask friends and family for their junk mail, that’s what I’m going to do. Also, if you have photos, you can copy them instead of using the originals. I also found that you can google images of things that you want and then print them off.
Agradezco mucho la síntesis de este artículo ,me veo reflejada en todo,hace años que lo hago pero hoy para mí es una sorpresa grande que se haya hecho tan popular,y que muchísimas personas tengamos ideas tan parecidas,sin conocernos y sin haber visto lo del otro
Thank you Maria, it definitely is always exciting to discover there others who are interested in creating!
WOW. What a wealth of information. Thank you so much for those of us whose interest has been peaked previously, but hadn’t a clue on how to really get started. As a retired educator with young children I have boxes of paper ephemera purchased for “art” projects. Enjoyed a very introductory, maybe 1 1/2 hour, collage workshop and enjoyed. Have been trying to declutter, but perhaps I can have more fun decluttering and junk journaling with all those saved ticket stubs, photos, restaurant receipts, greeting cards, etc. THANKS for SHARING
Thank you Karen, glad you found it helpful!
Thank you so much for all of the great information. I will definitely be attempting to create a junk journal.
You’re welcome Sherry, glad you find it helpful!
Thanks for all the great advice and excellent ideas!
You’re welcome Judy! If you have any questions just ask!
This is a first for me ! I have tried regular journaling but I just can’t get into writing only words….I need color, photos, prints etc. I will definitely try this once I finish my move. Returning to the States after 47 years abroad. Now I wish I had saved more ! Thank you , I enjoyed reading your post.
Thanks Polly! It’s such a great way to express yourself without necessarily having to find the words to say! You can cut out pictures from magazines, print stuff out from online, or even have fun doodling and drawing. We have lots of different resources on our site and if you have any questions just ask! 🙂
Hi, thank you so very much for all your information, ideas and “how to and what supplies to use”. This was very helpful! I do have a question for you, what is the difference between collage paste and gel (matte) medium? I use Mod Podge on top, after I have finished making a page as a clear finish.
Hi Ida, great question! Most paste has a different consistency than gel matte medium – it is a little starchier. One popular paste that many artists I know recommend is Yasutomo Nori Paste, but I have not tried it. I like gel matte medium because it does not remain tacky after it dries, whereas with Mod Podge sometimes it will stay tacky and cause pages to stick together. Hope that helps clear up the confusion!
My junk journal is so junky that I can’t close lt. is that ok
Of course that is okay!
Hello Chelle!
Greetings from France 😊 !
Just discovered your site and this article that is exactly what I was looking for !
I had already seen junk journal but most of them were for scrapbooking or using mixed media techniques that I didn’t like. I love journals, books and anything paper and have already a bullet journal, and art therapy journal, different art journals, and different writing journals for my personal development books !
I have been collecting paper, envelopes and collage bits for a while and today, while going through an advertisement leaflet I got inspired by a phrase and it inspired me to start collage and then to start making my own junk journal .
so I started putting together the papers and the envelopes , perforating them and made this really lovely book.
then I wanted to see other methods and I found your article so thank you again I love the Rings idea for my next bookbecause that’s exactly what I would have liked to use. I just used yarn now.
take care
Christine
Thanks Christine, I’m glad it was helpful for you!
A friend just introduced me to Junk Journaling, and I can’t wait to try it. I love to sew and do crafts, and I especially love the idea of getting to use a lot of different textiles. Your article was great and answered a lot of questions about some of the terminology I see on the FB page.
Thank you!
Nancy Birdsell
Rogers, Texas
Glad it inspired you Nancy, if you have any questions just ask!
Thank you for posting all of this information on Junk Journals. I’m excited to use Junk Journals as a Textile Arts project with my children this semester.
What rubber bands would you suggest for securing the signatures? I want to make sure they are the proper size and won’t crumble. Could elastic headbands be used in place of the extra large rubber bands?
Hi Angie, elastic headbands are perfect and are what I actually recommend if they are in your budget! The only thing to be careful of is make sure you get the thin style ones made by Goody – they also sell them at the dollar store but the dollar store ones aren’t the best of quality. Hope you and your students enjoy!
Hi, Chelle, I love this site so much. I’ve started a journal using your No-Sew Elusive Perfect Journal method, and I have a question. I have a magazine with lovely thick matte pages that I’m going to cannibalize for journal signatures, and I’m wondering what to do to those pages so I can write on them. You probably explain this somewhere, but I haven’t found it yet. Thank you so much for sharing your experience and expertise with us!!
Hi Glenda! Depending on the type of paper it’s just a matter of finding the right kind of pen that will write on them. If you plan on painting on them, a thin layer of gesso or gel matte medium can help if the paper is too glossy to write on. Hope that answers your question and if you need any additional help just ask!
I guess there is one thing I still question after reading this whole thing.
Why do people buy other people’s junk journals for big price tags?
Isn’t this a personal project?
Hi Laurie, Junk Journals to many people are works of art – so for many people it’s like buying a unique piece of art!
Oh, no, I got sick when I read this because I am 66 years old and what did I do? One day I got the idea to throw away old memories. I used to have my Mom buy a big scrapbook, empty to fill. The cover was always beautiful having grown up when hippies, greasers, and living off the land was popular. I would write in them and along with that different papers from gifts I. received and newspaper clippings. I lived in Detroit during that time and kept all the memorable Detroit Tiger’s World Series that was won even firecrackers taped in just lots of stuff thrown away. Four big old scrapbooks! I am sad.
Aw, I wouldn’t beat yourself too much about it Diane! Who knows why we do stuff like that but I’ve been guilty of it too! Maybe it was just time for you to let it go + move on. The good thing is you can always create a new book or journal! 🙂
Wow. Great ideas and info!!! Reading this as I am looking at piles and piles of paper stacks on my bed. Ha!!!
Thanks!!!
Glad it inspired you! Sounds like you have everything you need to get started!
I’m just starting my 1st Journal. I’ve been crafting for years. I have lots of supplies yet I still don’t know how to even start the first page. My OCD doesn’t want to make a mistake. I have the blank journal just need the confidence to start. Any information is appreciated. **
Thank you so much for this inspiring post… I have just completed two junk journals as gifts for two wonderful work colleagues/friends for their retirement. Loved every minute of each (very different) project .. they were such a delight as they grew to fit each personality. Truly individualised and without your post making it seem so simple .. I might have been a bit daunted… I just need to work out what not to do in place of my new junk journalling crafting …
I really enjoyed this article. Thank you for sharing your experience with all of us.
I wanted to sign up to get your emails but what came up seemed sketchy or maybe it’s just something I haven’t seen before. I hope to keep finding your articles and hopefully videos. Thanks again!
Hi Ann Marie, glad the article was helpful for you! Google discontinued Feedburner so that’s likely why it looked weird when you tried to fill it out! I haven’t set up a new newsletter yet, but come join our Facebook group if you haven’t already + share what you’ve been working on, would love to see it!
I love collage and have been art journaling for the past 10yrs. I’m totally addicted to making ephemera for future. This has made every sliver of anything become highly valued in my area. I won’t live long enough to use all these “treasures”. I am making a dent in the washing tape area 😀