Wondering how to get started with art journaling? In this post we’ll go over everything you need to know to learn how to start an art journal step by step.
Whether you’re already a paper crafter or planner addict – or even if you’ve never touched a paintbrush in your whole entire life – you can learn how to start an art journal!
The best part? It doesn’t have to be completely overwhelming – or even cost a lot to get started!
There is only ONE Thing You Need to Know About Starting an Art Journal
What is this one thing you need to know? You need to know THERE ARE NO RULES! Truly, no rules. There is no “right” or “wrong” way to get started!
All of them are great, all of them are perfect – because your art journal is YOURS. It is not up to what anyone else’s opinion on what should be in it or what you create!
Your art journal is your place for creative expression – and so you should do absolutely whatever makes you happy and toss all reservation out the window. Don’t worry if it’s good enough – because if you enjoy the process, it most definitely 100% is perfect.
So, yes, there is only one thing you really need to know about starting an art journal: There are no rules!
The emotional and stress-relieving benefits are many, and the more you create in your journal, the more beautiful your pages will become with time and practice!
First Things First: Here’s WHY You Should Start an Art Journal
Starting an art journal can be a very freeing way to express your creativity, work through thoughts and ideas, and experiment with new creative techniques. Learning how to create an art journal can give you a place to really explore your creativity!
Your visual art journal is your own private and personal space where you can write, draw, and create almost anything. It can be extremely freeing, because there are no limits.
Your journal pages can be about anything – from the playful silly to the contemplative and serious.
#1: To Work Out Thoughts and Feelings:
Ever have one of those Terrible, Horrible, No Good, Very Bad Days? They happen to all of us every now and then – sometimes it feels like more than just now and then!
Art journaling can give you the space to get all of those feelings out and express yourself, rather than bottling all of those heavy emotions up inside.
#2: Dream, Plan and Set Goals:

Every project I’ve ever started and goal I’ve reached successfully has had their humble beginnings in an art journal.
I’ve used art journals to plan events, organize my house, create business plans, set financial goals, and even for reaching my own personal health and fitness goals!
I’ve used art journals as planners so often it is actually what inspired me to write the post about planner theme ideas. There’s a creative planner idea for everything!
Something about being able to create freely can really help you overcome potential obstacles and see a path ahead to moving forward to where you want to be in life!
#3. To Awaken Your Creative Self:
Many people who start an art journal for the first time do not consider themselves artists, or even creative.
However, I truly believe all of us are creators – even if we do not feel that way!
An art journal is an easy way to help you connect with that inner artist and awaken your creative gifts that you may not even be aware you have yet.
#4. For Personal Development and/or Spiritual Growth:
Art journaling for me is a wonderful way to do some reflective thinking and grow both personally and spiritually.
It can be enlightening to explore your own personal beliefs and deepen your own personal understanding of this great mysterious thing we all know as life.
You can also use art journaling to help develop your own intuition or even explore your own spiritual gifts.
#5. To Play and Have Fun!
Something we often miss more and more as we get older is playtime.
Between busy hectic schedules, and all those pesky adult responsibilities like having to pay the bills and clean the house – making some time for just totally pointless fun and play is so important!
I love getting together with friends for creative art journaling get togethers, as well as exploring new techniques in my art journal that are simply just a big giant mess of fun.
So, yes, these are my top 5 reasons for WHY I believe art journaling is so important and beneficial!
And I realize we haven’t even gotten into the basics of how to start an art journal yet – but I think sometimes having a clear understanding for the intentions or even the reason for creating your own visual journal can help make the process so much easier in diving in!
Now that we have our why, we’re ready to start creating! Let’s get into this step by step tutorial, shall we? 🙂
Here’s HOW to Start Art an Journal Step by Step
Starting an art journal is fun and easy – this step by step guide will get you started creating with wild abandon in no time!
Step 1: Gather Your Art Journaling Supplies
Contrary to what you might think, you don’t need a lot of art supplies to get started – all you really need is paper, some sort of writing instrument and the desire to get started!
For just starting out, I recommend beginning with a sketchbook which has heavy duty paper designed for watercolors or acrylic paints. {See my list of the best art journals for beginners here}.
Here’s a Quick 5 Ingredient Creative List:
- Journal or Sketchbook with Heavy Duty Paper {Try the Dylusions Journal or the Canson XL Mixed Media Notebook}
- Acrylic or Watercolor Paints and Paintbrush {Kid paints and cheap craft paints are OK!}
- Gel Pens and Markers
- Old Books or Magazines and a Heavy Duty Glue Stick (avoid the washable “school” types if possible – while they will work, they can sometimes stop sticking when mixed with water!)
Of course, there are many, many awesome mixed media supplies and materials to work with in your journal. From acrylic paints to watercolors to spray inks and stamps and stencils to gesso and gel mediums and modeling pastes and gel printing plates…
Yeah, you could say it’s easy to get lost! If you look at our shop page on Amazon you’ll see all of my favorites.
But PLEASE …don’t think you need to rush out and buy everything at once. Start slow. Trust me, you will have plenty of time to build your collection little by little.
Step 2: Prepare a Space to Create
You don’t need a fancy art studio or even a lot of space to start art journaling – your kitchen table will work just fine!
However, you WILL likely make a bit of a mess when you first get started! I still make a big mess, and I’ve been doing this for many years. That is all part of the fun though!
It’s also nice to have some sort of container to hold all of your supplies, especially if you will need to keep your supplies and workspace portable. You can see more about how I like to organize my art supplies here.
Staying Organized
I LOVE using project boxes like the ArtBin storage containers for works in progress and something like the Iris Craft Keeper to hold smaller cut-outs, stamps, pens, and more. I love these project boxes because they are so flexible – I use these often!
They are great for storing your supplies in one neat place such as on a bookshelf or in a closet – keeping the mess out of view of ready to go whenever you are ready to create.
It also makes clean-up so much easier for those days you’re crafting on the kitchen table but your family want to do something crazy like eat dinner, lol…
Of course, you don’t need these things to get started, and don’t let not having them stop you from starting either! As I’ve always said – you could start with just a few magazines and a glue stick and a ball point pen and cardboard boxes from your kitchen pantry.
Step 3: Start by Creating a Background
There’s really no wrong way to create your background pages in your art journal – so if you have an idea, just dive right on in!
However, I think the hardest part is when you first start and you are staring at that blank page and have no idea what you are going to create. Here are some very simple background ideas I like to start with that you can try:
Torn up Papers Background:

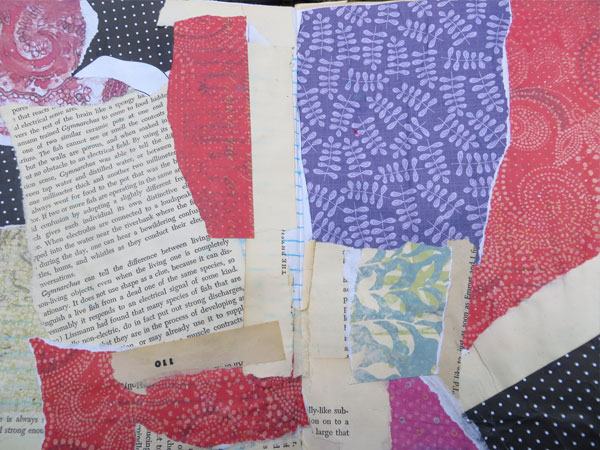
This is simply some ripped up pieces of leftover scrapbooking paper and some old pages from a damaged book glued into a composition notebook. You can rip the papers in any shape to be any size and start layering them together.
You can use a simple glue stick or a collage adhesive like matte gel medium – but whatever you do, DO NOT USE Mod Podge! Mod Podge tends to leave surfaces very tacky and sticky – and you will be very sad if your pages stick together. I love Mod Podge for other creative projects, but it’s best to leave it out of your art journals.
This background is ready for layers of paint, or almost just pretty enough to leave it as it is!
Watercolor Painted Background:
This background above was created by mixing watercolor and glue and salt. More details on this technique can be found on our post on Watercolor Background techniques here.
Acrylic Painting Background
I also love painting random strokes with different colors in acrylic paints. Paint lines, blocks, circles, triangles, splatters – the sky is the limit!
Here’s a super basic beginning with different random acrylic paint strokes:
Like the journal I used above? This is the Canson Mixed Media XL 7×10 Notebook.
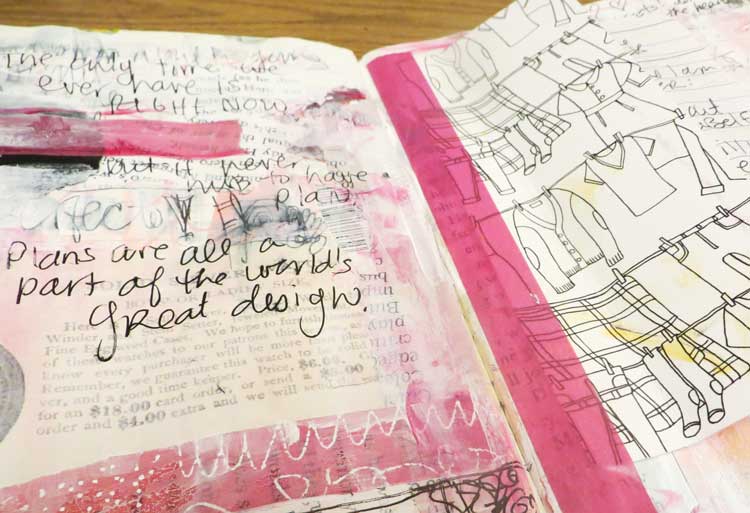
Many times I have a LOT to write out, but it’s not necessarily something I want to be the focal point of my pages. I often will write things out, even writing over myself and doodling on pages before covering them up with collage and paint.
This was the beginning of a page in the Dylusions 8.25 x 11.375 Art Journal, which soon quickly became a whole new page!
Step 4: Add Layers
Working in layers is how you can build your pages to have more depth, interest, and even more personal meaning to you.
In the page above, you can see I’ve kept adding in more paint and marker detail. This page already has about 5 layers just in the photo above!
There are a number of ways to create layers of course – but one simple way is to just keep adding on more paint and magazine/book page cut-outs until you are happy with how everything looks on the page.
Note, if you are working with watercolor, you will want to be careful that you don’t reactivate the watercolor paints in the first layer – this can sometimes cause muddy colors or unintended results.
Once the paint is dry, you can also add in sketches, doodles, and drawings to your journal.
Adding in text, quotes, song lyrics and more can give you easy starting points for adding in words and texts for the “journaling” aspect of your pages if you would like to add writing.
Step 5: Let Dry
Something that many new artjournalists struggle with is pages that stick together. Pages sticking together is one of the worst things ever!
If you live in a hot, dry climate and paint dries fast where you live, you will likely not have to worry about this too much. However, if you’re like me and live in a place which is always humid, raining, and overcast – this can cause it to take days if not longer for your pages to dry.
Most of All: Have Fun Art Journaling!
Art journaling is a lot of fun and can be a great way to relax, unwind and express your creativity! There are no rules to art journaling, so of course this means there is no wrong way to learn how to start an art journal either!
You can create any types of pages you like – and of course also enjoy many different styles and techniques and experiment – that is the fun of it!
Here are Some Other Helpful Articles Here for Beginners You Might Like:
- Overcoming Fear & Perfectionism in Art Journaling
- Art Journal Fails: Create Anyways
- Art Journal Supplies for Beginners
And of course, if you need some inspiration, we have plenty of art journal prompts to inspire you! These journaling prompts are the perfect way to spark your creative imagination!
I hope you find this helpful, and of course, if you have any questions about how to start an art journal, share your questions in the comments section below – I’m always happy to help answer any questions you may have.
Join our facebook group!

Share what you’re creating and working on, ask questions + connect with over 4000 creative artjournalists for inspiration + ideas!
