Do you ever feel like you don’t have enough time in the week to art journal? Today I wanted to share a fun and simple way to make a little journaling time for you each and every day – without a big mess!
If you’ve ever wished you could create full journal spreads or get frustrated that your journal pages take too long to make – this method is for you!
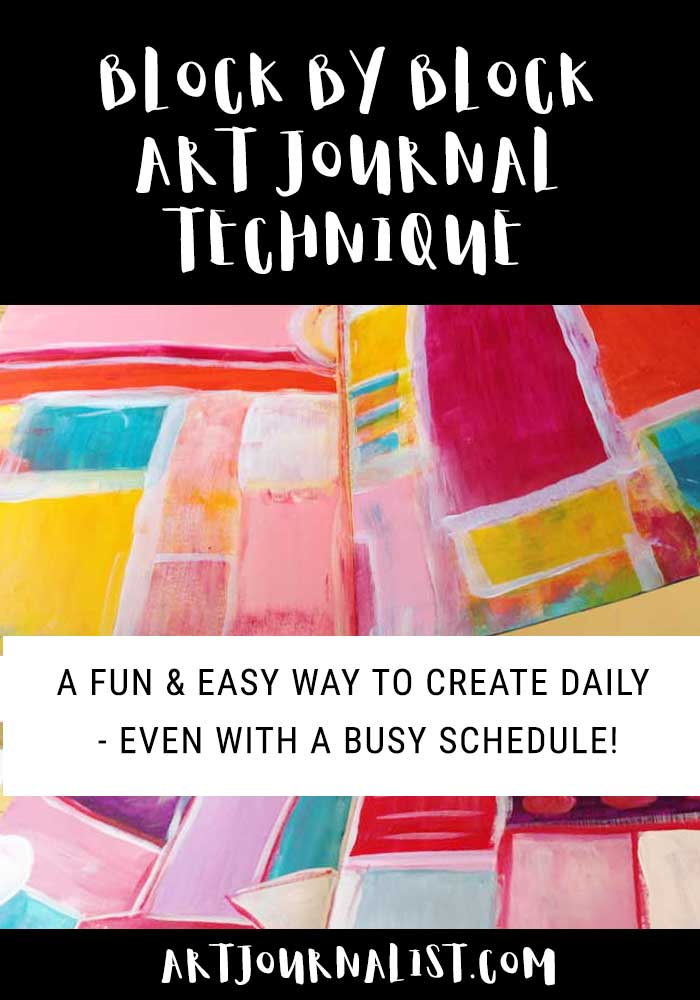
I call it the Block by Block Weekly Journaling method – where you create a full page spread over the course of a week or a few days.
The “messy part” is done up front so that you can continue to create in your art journal without necessarily having to make a giant big mess or needing to pull out the art supplies.
We basically create a block grid-style background for our journal and then whenever we have time we can easily add to it anywhere or even just a few minutes a day.
You also don’t need to drag out all the art supplies to do this method, so it’s great for days you don’t have a ton of energy or maybe only have access to a pen or a glue stick.
Why Use This Method?
I started doing this technique several years ago when I didn’t have much dedicated space at home for art supplies or journaling.
We live in a teeny tiny house with three kids – so finding my own space has always been a challenge!
When you have a busy schedule or small spaces for creating, this can really help you enjoy the creative process, little by little – and block by block!
Weekly journal blocking allows me to create my backgrounds for pages in all one go – so the rest of the week I can cozy up on the couch or even the bed with just a few of my favorite pens or a glue stick and some collage sheet cut outs.
These block grid journal pages are so fun to create! It’s super simple! It’s also a great way to get out of a creative rut when you feel like you can’t draw or paint or aren’t “good enough”. I can’t wait to share the technique with you!
Here’s How You Can Make Your Own Block Grid Journal Pages Using This Method:
I use days here, but other than the first day where you start by painting the background, it doesn’t necessarily even have to be done on a daily basis. By “Day” I mean “Whenever You Have Time”. Okay, here we go:
On Day 1: Create Your Sectioned Backgrounds
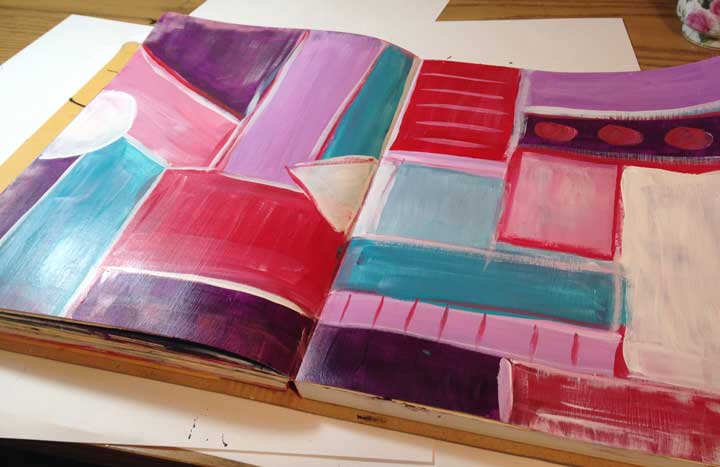
The first place to start is to be begin by painting a couple of pages in your journal, painting large sections or “blocks”. You can experiment with all sorts of journal blocking layouts.
I typically prime my pages with Gesso before adding the acrylic paints – it’s not absolutely necessary, but I have found it does help the acrylic paint to take better to the paper and be smoother to write on.
Here’s a couple of examples of backgrounds I made with block sections:
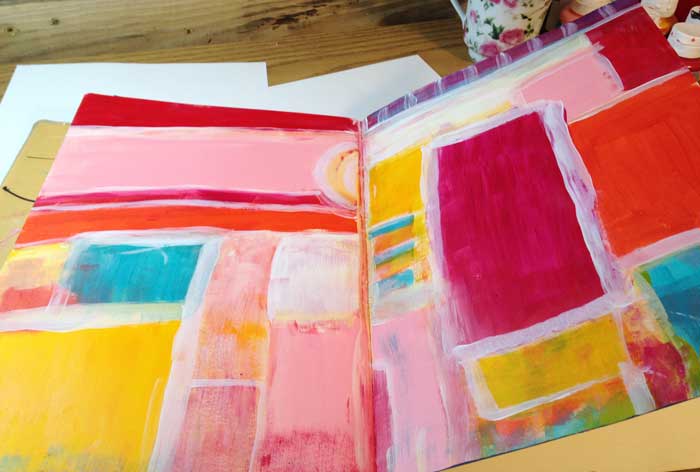
You can experiment with a number of different color options – make it bright and bold, stick with complimentary colors, or even go for a monochromatic coloring scheme.
You also don’t even need to make your pre-made backgrounds true blocks. This one has circles:
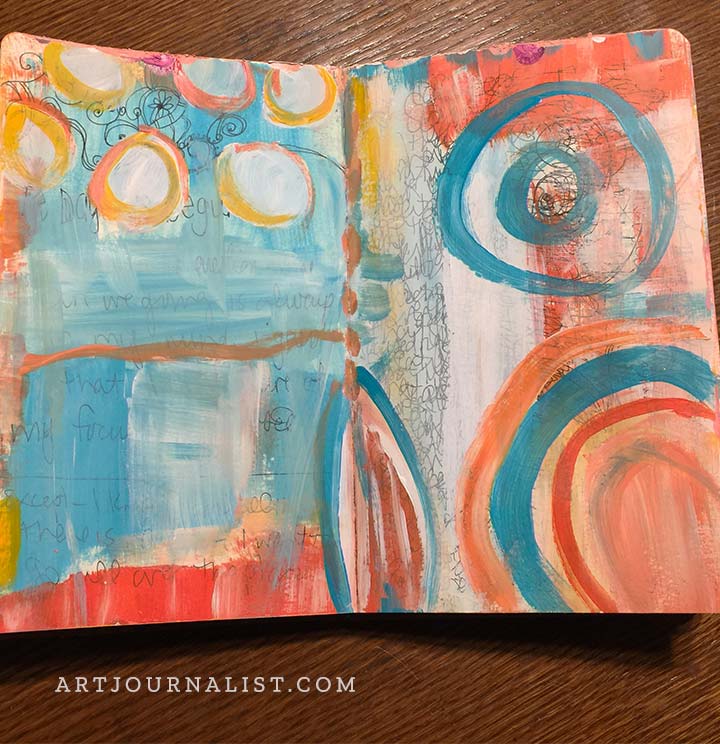
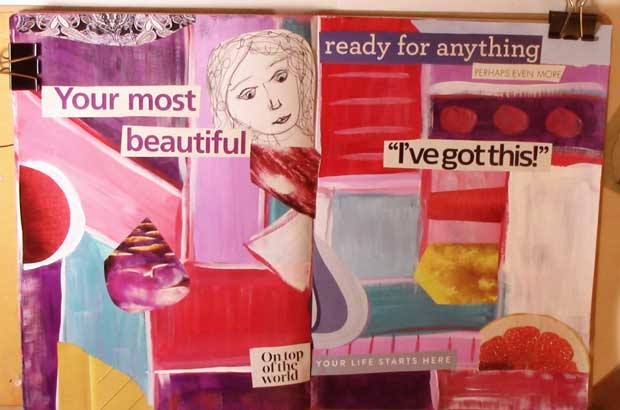
Here’s the background of the block by block journaling page I made for the example in this post. Some sections I even added lines + dots and circles and triangles too!
Once painted, you can then either use a heat gun to dry your backgrounds, or let it dry overnight. This is important!!!
Letting your pages dry fully before you move onto the next step will prevent them from sticking together! It also makes it easy to add a variety of different pens and markers on top of the paint. Most pens won’t write on wet or brand new paint – so letting it dry fully helps a whole lot!
Day 2: Add Any Collage or Paper Ephemera
On my second day I usually like to go through different collage pictures or old books for different sayings and phrases. I don’t usually set out with an art journal page theme – although more often than not I’ll find the words and phrases I discover tend to match my current thoughts and whatever events might be going on in my life that week.
The universe likes to synchronize like that!
Once I have some images and words selected, I will glue them down in various places on the page. I like to put these cut outs between different colored sections, to create a little contrast.
At this point, I might begin some writing or sketching – but on days I don’t have that kind of time I don’t stress it because I know the next chance I get I can start working in my journal again easily and without needing to even be sitting at my desk!
Day 3: Start filling in with doodles, sketches and journaling!
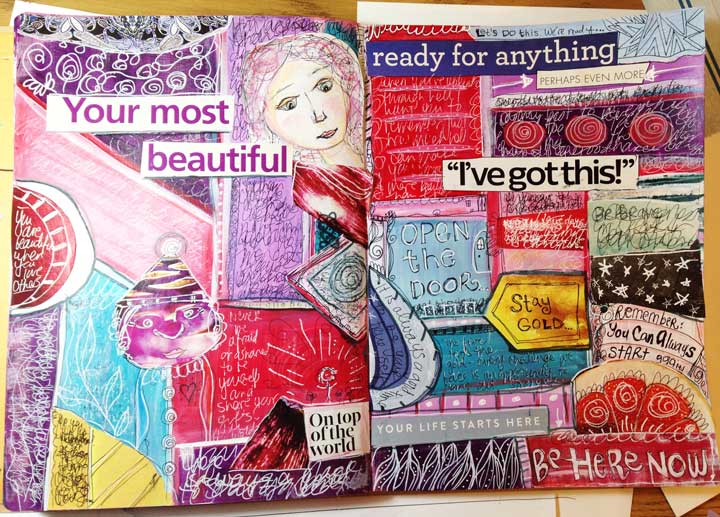
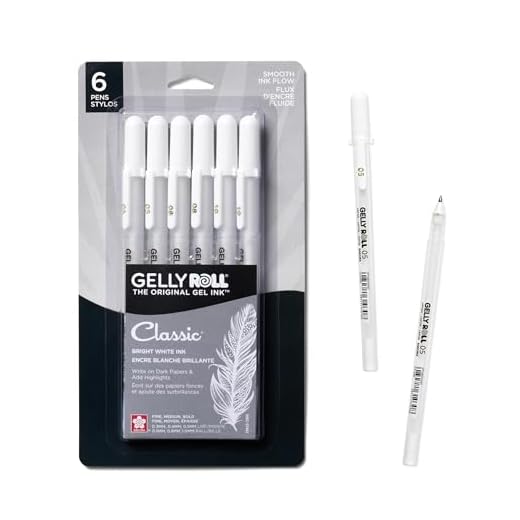
For this part, I usually stick to my two favorite mediums: pens and markers. I love Uni Posca markers and Sakura White Gelly Roll Pens for adding in details and doodling.


One of the reasons I really love this step because it is very spontaneous and the supplies required are so portable! I can literally do it anywhere – at my daughters gymnastics practice, curled up on the couch with a couple of my furry family members, even in bed!
Since I’m only using pens and markers, it’s not nearly as messy as something like ink spray.
It doesn’t make a mess, and I can still be creative even with a busy schedule or days I’m not overly energetic after waking up at 5:30am so that’s a win-win.
The key is to just work in small blocks and sections at a time. There’s no rush to finish the whole page, so have fun with each block – or, feel free to skip around!
Some nights I might be all over the page and then others I am more concentrated on a certain area.
Sometimes I finish the page in one night – sometimes I add to it over a couple of weeknights. You don’t have to finish it all at once!
What works for you and your schedule works best!
Here are some of the things I do in this step:
- Practice lettering, writing quotes/sayings/phrases
- Doodles – I tend to incorporate a lot of swirls, circles, and other basic shapes
- Sketches
- Journaling – Often times I will write some thoughts out about whatever quotes or words are already on the page.
- Finishing details – such as dots, lines, stripes, etc.
After this, sometimes I will go in with colored pencils to add a little more shading and depth to the page.
If you’d like to watch this process from start to finish, I made a video of how I create these pages on our YouTube channel. While I love this method for little short journaling bursts – it’s also a really fun way to create even when you do have the time to do a full page at your desk!
I hope you enjoy this method for creating and give it a try! If you create anything using this method, I would love to see it! Join our Facebook Group to share your creative journal pages!
Join our facebook group!

Share what you’re creating and working on, ask questions + connect with over 4000 creative artjournalists for inspiration + ideas!